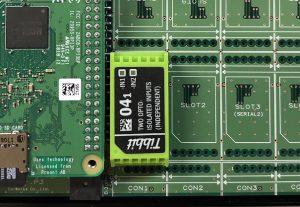
#04 フォトカプラ入力
Tibbitの配置
Tibbit #04を挿入します。
#04-1から8までありますが、どれもノードの使い方は同じです。
ただし、Tibbitブロックによって使用できるLINEが違いますので、各回路図をご確認ください。

ノードの配置
ライン指定のために、functionノードを使用します。

以下のようにフローを配置します。

functionノードの編集を開き、コードに以下を記述します。
値を取得したいラインを指定します。
|
|
msg.payload = [{line: 'A'}]; return msg; |
ラインを複数取りたい場合は、以下のように指定ができます。
|
|
msg.payload = [{line: 'A'},{line: 'B'},{line: 'C'},{line: 'D'}]; return msg; |
ノードの設定を開き、スロットを選択します。
Node-REDデプロイ後、injectノードをクリックすると値を取得ですることができます。
Outputsは指定したライン分、配列で取得できます。

サンプルフロー
|
|
[{"id":"bdb4eedb.f18998","type":"Tibbit-#04","z":"55785919.c3dbf8","name":"","tpSlot":"S01","communication":"GPIO","pinA":"IN","pinB":"IN","pinC":"IN","pinD":"IN","connectedStatus":"start","host":"","x":420,"y":740,"wires":[["83aa131.5ddfd7"]]},{"id":"556386c9.df42c","type":"inject","z":"55785919.c3dbf8","name":"","topic":"","payload":"","payloadType":"date","repeat":"","crontab":"","once":false,"onceDelay":0.1,"x":180,"y":680,"wires":[["4eac3f09.1c2688"]]},{"id":"83aa131.5ddfd7","type":"debug","z":"55785919.c3dbf8","name":"","active":true,"tosidebar":true,"console":false,"tostatus":false,"complete":"false","x":590,"y":740,"wires":[]},{"id":"4eac3f09.1c2688","type":"function","z":"55785919.c3dbf8","name":"ライン指定","func":"msg.payload = [{line: 'A'}];\nreturn msg;","outputs":1,"noerr":0,"x":330,"y":680,"wires":[["bdb4eedb.f18998"]]}] |
Edgeの取得
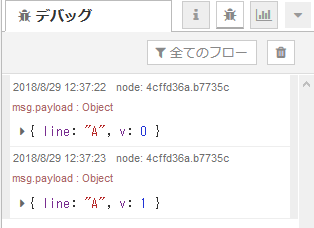
INのEdgeを取得したい場合は、inノードを使用し以下のようにフローを配置します。

OutputsはラインとHIGH/LOWが出力されます。

サンプルフロー
|
|
[{"id":"dfd0dcc9.59d31","type":"Tibbit-#04 in","z":"55785919.c3dbf8","name":"","tpSlot":"S01","outputOnly":true,"communication":"GPIO","pinA":"IN_Edge","pinB":"IN_Edge","pinC":"IN_Edge","pinD":"IN_Edge","connectedStatus":"start","host":"","x":220,"y":860,"wires":[["4cffd36a.b7735c"]]},{"id":"4cffd36a.b7735c","type":"debug","z":"55785919.c3dbf8","name":"","active":true,"tosidebar":true,"console":false,"tostatus":false,"complete":"false","x":390,"y":900,"wires":[]}] |
 Tibbo-Pi 販売終了のお知らせ


